Physical Address
304 North Cardinal St.
Dorchester Center, MA 02124
Physical Address
304 North Cardinal St.
Dorchester Center, MA 02124

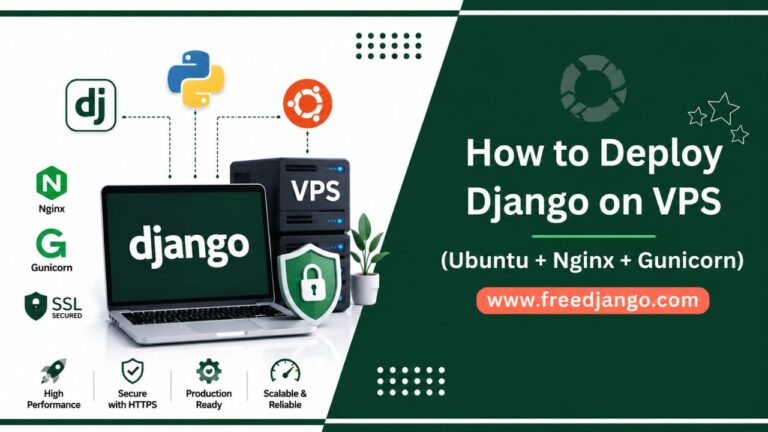
Deploy Django on Shared Hosting cPanel: In below article, I represent you a step-by-step technique to deploy a Django project on ‘shared hosting cPanel’.
One of the advantages of the Django project is that it is highly affordable. But the disadvantage comes at accessing SSH root access, which by the way is not granted in Shared Hosting. Best you can do is calling Python modules via pip. However, some modules may not function correctly.
The basic site and blogs work awesome via Django. However, utilizing the pip command, you can easily manage advanced websites.

Be it the readymade framework, Python’s architecture, or the lovely Django community, laying hands on a Best Django Hosting is beneficial for any enthusiastic web developer.
Django is filled with shortcuts to form Web developers’ lives easier, but all those tools are of no use if you can’t easily deploy your sites. Since Django’s inception, simple deployment has been a serious goal.
There are many options for deploying your Django application, supported your architecture or your particular business needs, but that discussion is outside the scope of what Django can offer you as guidance.
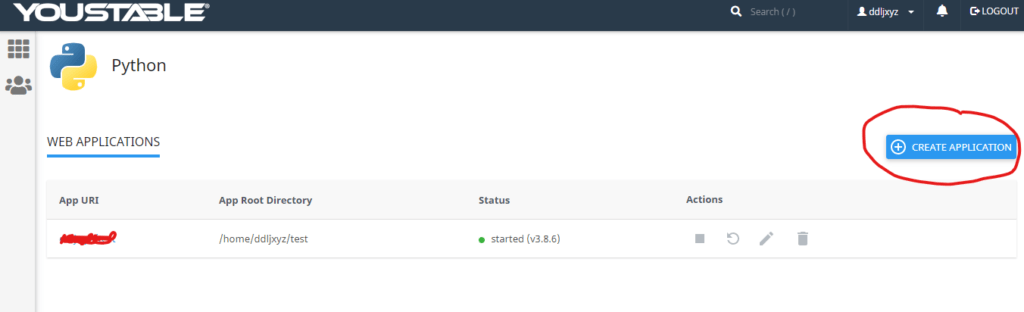
I have the Shared YouElite Plan of the YouStable Shared Hosting which I will be using in this post.
The basic YouElite plan provides you MySQL databases using which you can use the version 3.8.6 of Django because we will be using the pymysql module command for the database
drivers and the driver provided by pymysql works until Django 3.8. 6 you can also use the latest version of Django as per your choice.
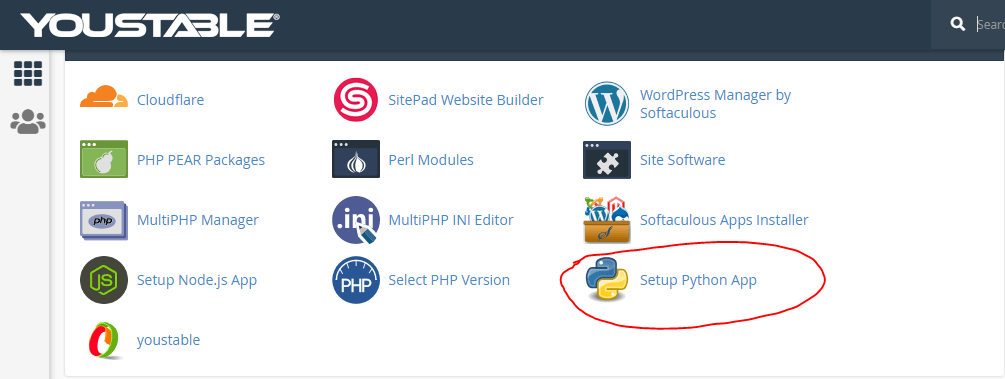
Now Open “MySQL Databases” in cPanel.

Create a “new Database” and note the database name. We will need it “later”.

Create a new MySQL user and note the username and password. We will need it later.
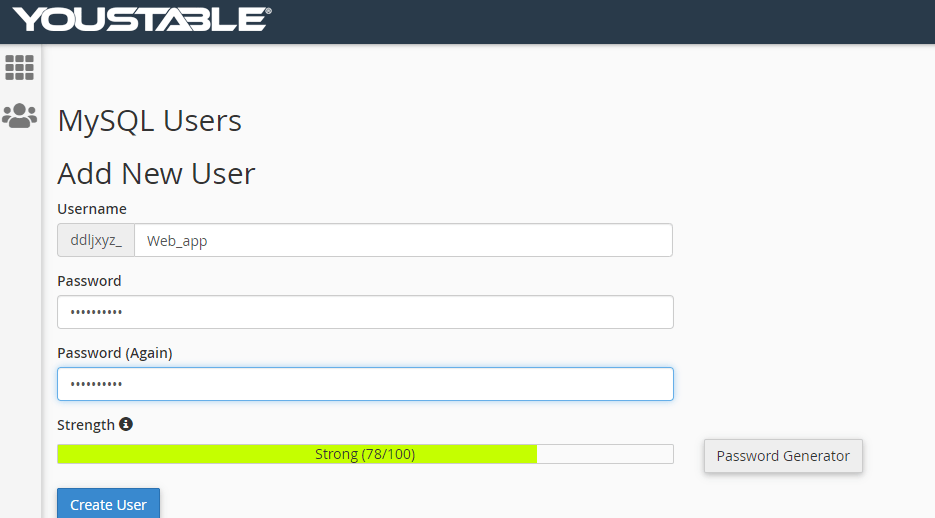
Add the “New user” to the new Database.

Grant all the “permissions” to the user and select Make Changes.

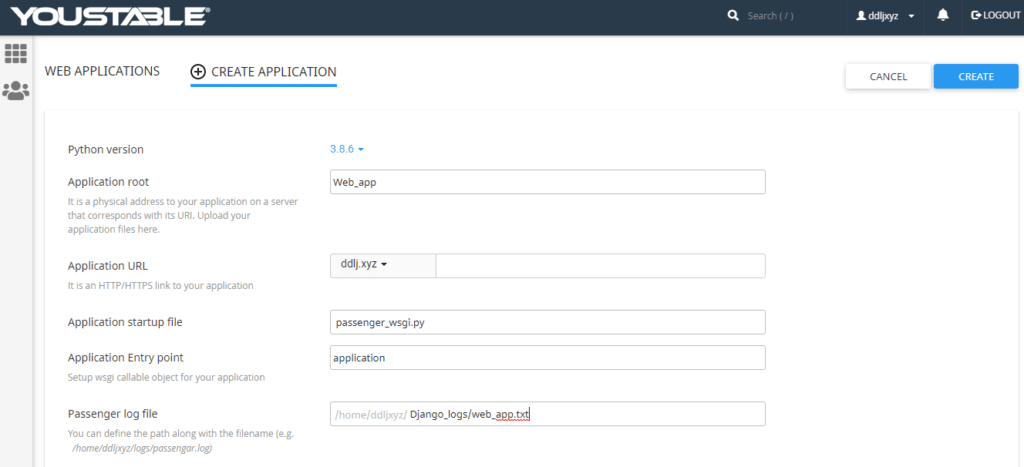
Now Extract the ZIP File of your Prject.
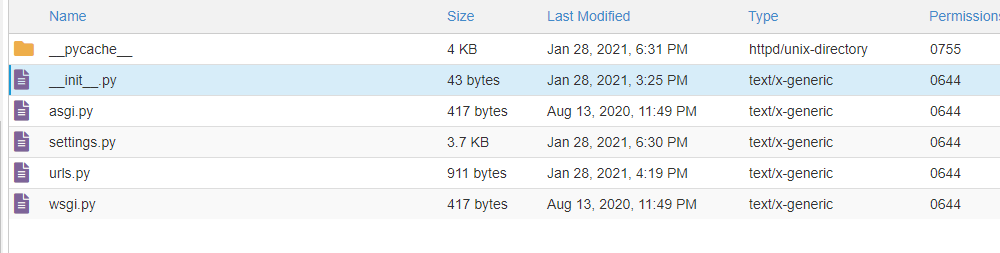
Your project files should be in the Similar folder as the passenger_wsgi.py file in Deploy Django in Shared Hosting. Make assured that manage.py and passenger_wsgi.py are in the same folder.
Now, Edit the “Passenger_wsgi.py” file.

The Base is your Project Folder name
Add the following code to the file:
from base.wsgi import applicationWhere the base is your project folder. it’s an equivalent folder that contains your settings.py file. it’ll vary if you’re not using the test project that I provided. you’ll locate your wsgi.py file and import application from it.
Now edit your settings.py

Add your domain to the ALLOWED_HOSTS list. If there is a www version of your domain, add that too. Do not use http:// to https://

Now go to the end of the file, modify STATIC_URL and change the STATIC_ROOT

Now edit the __init__.py file
Add the following code
Copy the Following code and paste it in __init__.py

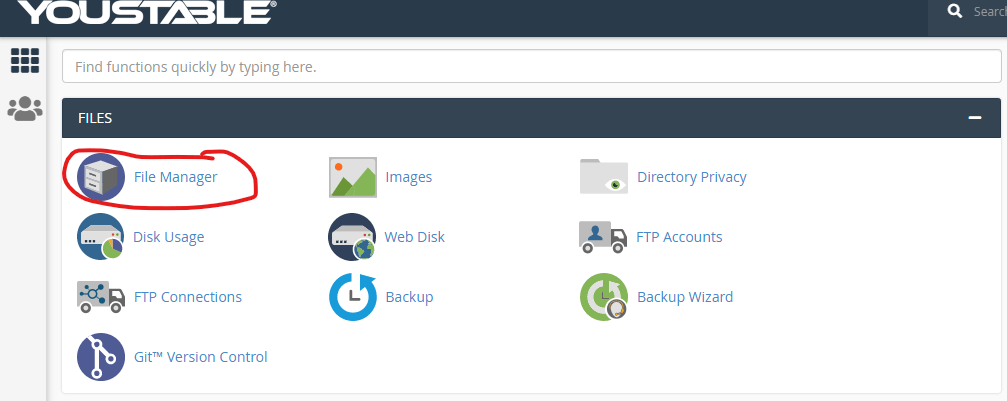
Open the Terminal in your CPanel. If you can not find the terminal, go to Manage Shell and Enable SSH Access. You can also do these steps using SSH but using the terminal is easy.

Copy the command to enter the virtual environment from your python app.
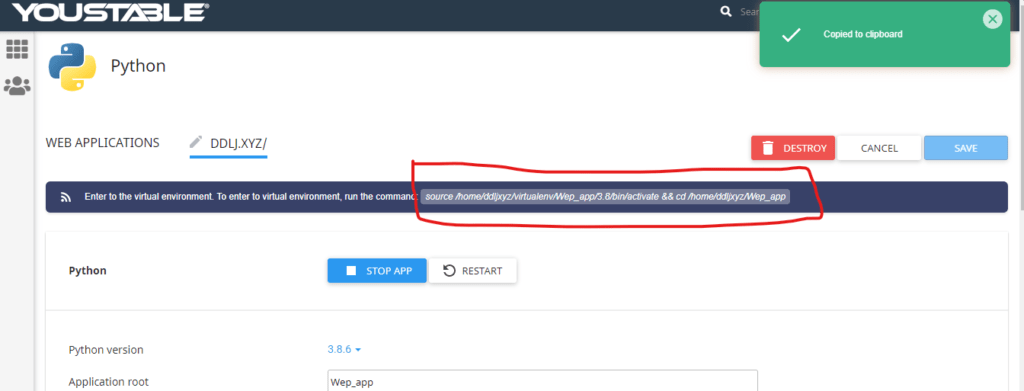
Paste your Code here-

Install Django “According to your Python Version” by running the following command.
pip install django==3.1.4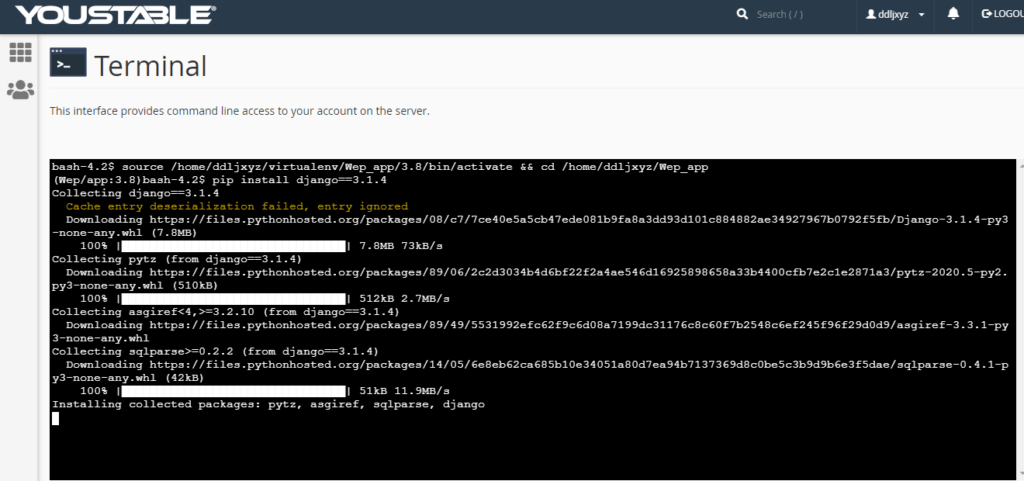
pymysql is required for using the MySQL database. Install it using pip. Here you will install any other modules required by your Django app.
pip install pymysql
If your migrations are not complete, then make migrations.
python manage.py makemigrationsCopied!Run migrate to create tables in the database.
python manage.py migrateRun collectstatic to move the static files to the static root folder specified in settings.
python manage.py collectstaticRun createsuperuser to ass a user to the Django admin panel
python manage.py createsuperuserFinally, All Done 😊.
restart the “python app”.

Your Django app is Installed Successfully.
Now enjoy your Project 🥰.
Read Also:- Best Cheap WordPress Hosting in India
For Free you can go for GoogieHost, Pythonanywhere, or Heroku. You can also set up a fully functional web server within a coupon.
Follow the steps Above and Install your Django App Easily, If feel any Mistake Comment in Comment section.
First of all let me tll you Django is Framework, you Can Use Easily for both backend and frontend.
Hope the hole above Tutorial of Deploy Django on Shared cPanel Hosting helped you.
Deploying a Django project on shared hosting may seem like a challenge due to the lack of SSH root access, but as we’ve demonstrated, the cPanel Python App tool makes it entirely possible and highly cost-effective. By following this step-by-step guide, you have successfully bridged the gap between local development and a live, professional production environment.
Remember, the key to a stable deployment lies in the details: correctly configuring your passenger_wsgi.py, linking your database via pymysql, and ensuring your static files are properly collected. Whether you are hosting a personal blog or a data-driven web application, shared hosting remains a powerful, budget-friendly gateway for Python developers.
Now that your app is live, your journey is just beginning. Start exploring advanced features, monitor your logs for performance, and keep your dependencies updated to ensure your site remains secure and fast.
If you Foud this Article helpful or have any suggestions about it, let us know in Comment section.